8 Tips for editing underwater video
One of the most important aspects of all video genres is editing. If you’re an aspiring underwater videographer, you’ll also have to know the ins and outs of underwater video editing to make your films look as professional as possible. Here are some valuable tips on editing your underwater video footage.


Build professional skills as an underwater videographer on the tropical reefs of Southern Africa
1. Planning your shoot for the edit
While you’re filming, it’s important to keep in mind that you’ll be editing this footage later. If you’re constantly thinking about what will work during the edit, you’ll automatically focus on getting the necessary shots. In other words, make sure you shoot in the best light possible. Get enough wide, mid as well as close-up shots of marine life. If you’re filming a fish swimming, ensure it enters and exits the frame of the shot. Film a scene for long enough so you have a decent amount of footage that’s not shaking or blurry. All of these details make the editing process much easier.
2. Choosing and editing program
A lot of videographers are happy with GoPro Studio for editing underwater GoPro videos. It’s easy to use and specifically designed for GoPro footage. Two other popular editing programs for underwater video, with GoPro or other cameras, are Adobe Premiere Pro and Adobe Final Cut Pro. Final Cut Pro is specifically for Apple. Though Premiere Pro also works best on an Apple computer, you can use it on a PC as well.
If you’re only starting out, there are free video editing software options on desktop and mobile. It won’t give you the same quality or features and might contain a watermark, but it’s ideal for practising your editing skills as an amateur. While Premiere Pro is more expensive, the colour tools are better for underwater video editing than Final Cut Pro’s (see tip 5).
3. Storytelling
The essence of a documentary video is to represent a piece of biological information in the form of a story. The story element is what draws the viewer in. This is why it’s important to have a good story weaving your footage together to make it interesting and appealing. You have to know what your story will be before you start filming. In addition, you might need to do some research and write a script beforehand if your video will have narration. For this, you will have to make sure you get all of the shots needed for your story. For instance, if you choose a starfish as a character, you’ll need more footage of starfish than of the other marine animals you encounter.
There is an art to editing the footage you have into representing a story. You work with the script or audio to make the images flow into one another – not necessarily in the order the footage was taken, but in the order that will tell your story in the best way. Take as much footage as you can, and go through all of it when you edit. Choose only the best shots for your story.
4. Audio
First, decide if you are making a short underwater video snippet with just a chilled soundtrack, or a longer documentary film with narration and music. If you know this early on, you’ll also have an idea of how your editing sequence will look like. Place the shots according to movements in the music, or to what the narrator is speaking about. In this way, the audio and the footage work in harmony that makes for a successful underwater video.
The best and quickest source of video soundtracks is a royalty-free music library from where you can download and use beautiful music for free.
Download FREE eBook featuring 18 International scholarships to fund overseas experience travel

5. Colour correction in underwater video editing
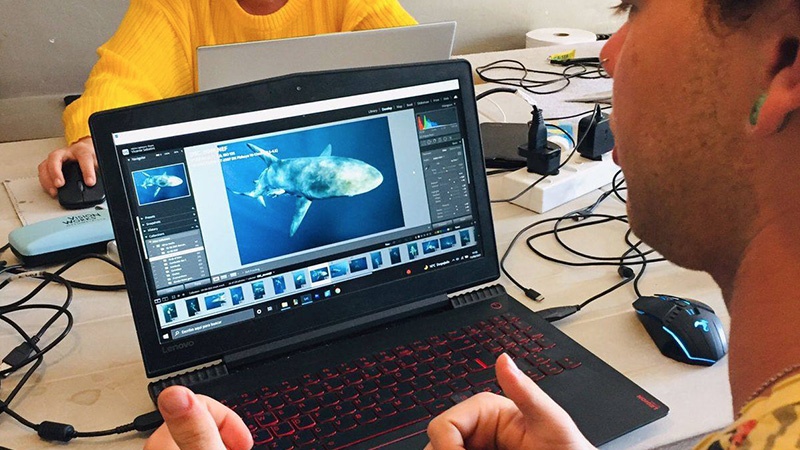
Because colours appear more subdued and faded underwater, your footage of a colourful coral reef might appear dull on film. It’s best to set the red filter or white balance on your camera as you’re filming, but sometimes it still doesn’t come out 100% correct. Luckily, you can still fix this in post-production by adjusting the colour balance of your footage. It will make your subject appear more vibrant and your footage more appealing.
Different editing programs have different colour correction tools. GoPro Studio has straightforward tools for adjusting white balance, sharpening the footage and setting the colour temperature, tint, contrast, exposure and saturation. Check out this video on how to correct colour on GoPro Studio:
On Final Cut Pro, you have several colour adjustment balls that you can use to change the colour, tint and temperature. Premiere Pro has a very user-friendly and effective colour correction settings. They use Lumetri Color, with sliders to adjust every colour setting from hues, tints and temperatures to white balance, exposure and saturation.
6. Be organised
Once you have all of your raw footage, tag and name them in different folders on your editing program. Use a filing system that works best for you. Make sure you know where each clip is stored. It will save you tons of editing time, as you won’t have to go through all of the footage to search for one specific clip each time. Also, store all of your footage on a hard drive, even if you’re not using it in your current project. You might want to use it again for a future video.
7. Shorter is better
Unless you’re working on a major marine documentary production with a film team, it’s best to keep your video short and simple. Especially if you’re planning, filming and editing for your video, it’s best to keep your video under 5 minutes. This is considered the maximum span of time that people will spend watching your video online. If the audio consists of only music, make it even shorter, as there isn’t a narrator or script moving your story forward. Take out every single unnecessary shot, even if you think it’s too amazing to get rid of (“kill your darlings”, as the saying goes). Keep only the best and most essential shots for your planned underwater video.
8. Share your video
Lastly, a beautifully edited underwater video is of no value if nobody sees it. Make sure you use all of the online platforms at your disposal to share your video. Have a blog or an updated YouTube channel. Share a compressed version of your video on social media. Send an email to your friends and colleagues. Remember to keep a high-quality exported version for your personal portfolio, to use for future freelance jobs or film competitions. Always keep in mind that with every new video, you are building your reputation as an underwater videographer.
If you found this post useful, feel free to share it! Any other editing tips we should add? Let us know in a comment.

Blogger Profile - Rouxne van der Westhuizen
Rouxne has an Honours degree in journalism and media studies. She specialises in wildlife conservation writing, travel journalism and blogging.
Kickstart your wildlife media career!
Find your perfect wildlife media speciality program


